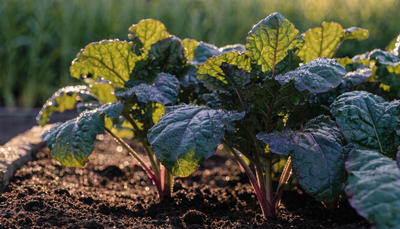
Kale has earned its reputation as one of the most reliable, nutrient-dense vegetables you can grow in a home garden — and organically it's even better. Conventional kale farming leans heavily on synthetic nitrogen to push fast, bulky growth, but that speed comes at a cost: lower mineral density, softer leaves, and more pest pressure. Organic kale grown in living soil with proper nutrition produces darker, more flavorful leaves with significantly higher levels of glucosinolates and antioxidants. It's also tougher — naturally resistant to disease and better equipped to handle temperature swings.
This guide is written for beginner and intermediate growers who want reliable harvests of high-quality kale using organic methods. You'll learn everything from variety selection and soil prep through watering, fertilizing, pest management, and ongoing harvest. Kale is genuinely forgiving as vegetables go, but a few key choices early on will determine whether you get a mediocre result or a genuinely impressive one.
Choosing the Right Kale Varieties
The Main Types
Kale comes in several distinct groups, each with different flavor profiles, leaf textures, and cold hardiness:
- Curly Kale (e.g., Winterbor, Starbor) — the most widely recognized type; tightly ruffled leaves, robust flavor that sweetens after frost. Extremely cold-hardy and productive. Best all-rounder for new growers.
- Lacinato / Dinosaur Kale (e.g., Nero di Toscana, Black Magic) — long, dark, blistered leaves with a sweeter, more refined flavor than curly types. Excellent for cooking; holds texture better when heated.
- Red Russian Kale — flat, oak-shaped leaves with a purplish tinge; the mildest and most tender of the kales. Better raw than the others. Less cold-hardy but extremely fast to harvest.
- Siberian Kale — exceptionally frost-tolerant, coarser texture, mild flavor. Good for overwintering in cold climates.
- Baby / Salad Kale mixes — bred for quick cut-and-come-again harvesting at small leaf size. Ideal for container growing and small spaces.
For Beginners
Start with Winterbor (curly) or Nero di Toscana (lacinato). Both are highly productive, disease-resistant, and well-documented. Once you understand how kale grows in your specific conditions, you can experiment with less common types. Grow two or three varieties simultaneously to extend your harvest window and have options for different dishes.
Soil Preparation for Organic Kale
Ideal Soil Conditions
- pH: 6.0–7.0 — Slightly acidic to neutral. Kale is not fussy about pH within this range, but outside it, nutrient uptake suffers.
- Texture: Rich, deep, well-draining loam. Kale is a heavy feeder and needs a soil that can hold nutrients while still draining freely.
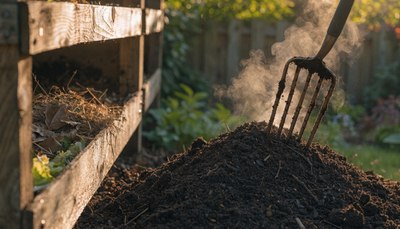
- Organic matter: High — 4–6%. Incorporate well-aged compost (not fresh manure) before planting. The more biologically active your soil, the less supplemental fertilizer you'll need.
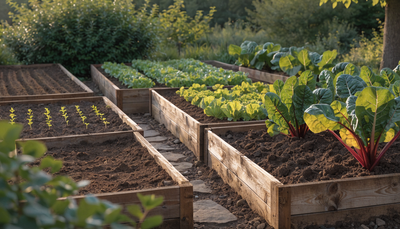
- Drainage: Good. Kale tolerates cool, moist conditions but not waterlogged soil. Raised beds are ideal in heavy clay areas.
Building Living Soil
Kale is a heavy nitrogen feeder, which means it's tempting to simply dump on synthetic nitrogen and get fast results. Don't. Fast-forced nitrogen growth produces leaves that are nutritionally hollow, attractive to aphids, and structurally weak. Instead, build a soil that cycles nitrogen naturally.
The key to this is microbial activity. Before planting, inoculate your soil with Growganica MICROBES. The microbial populations in MICROBES — including nitrogen-fixing bacteria and beneficial fungi — establish a living system in your soil that converts organic matter into plant-available nutrients continuously throughout the season. This means steadier, more sustained nitrogen delivery than any synthetic feed can provide. Apply MICROBES at bed preparation time, watering it into the soil thoroughly.
Planting Kale: Timing and Technique
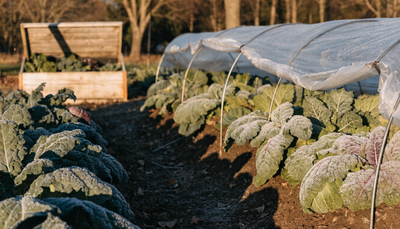
Kale is a cool-season crop that performs best at temperatures between 45–65°F. It bolts in summer heat but thrives — and actually improves in flavor — after light frosts. This gives it two natural growing windows:
- Spring planting: Direct sow or transplant 4–6 weeks before your last frost date. Kale can handle light frost at any stage.
- Autumn planting: Often the superior option. Start seeds in midsummer and transplant in late summer for a crop that runs through autumn and into winter. Frost converts leaf starches to sugars — autumn kale tastes markedly better than spring kale. Kale overwinters reliably in USDA hardiness zones 7 and warmer; in zones 6 and colder, row cover or a cold frame will carry plants through the winter.
Sow seeds 1/2 inch deep, 2–3 per cell or station. Thin to one plant when seedlings reach 2 inches. Final spacing: 18–24 inches apart for full-size plants, 10–12 inches for baby leaf harvesting.
Direct sowing works well in cool weather. Transplants give you a head start in spring and allow for better timing in autumn. Either way, water in well after planting and keep soil consistently moist until established — kale seedlings are not drought-tolerant.
Watering Kale Organically
Kale needs consistent moisture but not saturated soil. Aim for 1–1.5 inches of water per week. The key word is consistent — irregular watering (dry periods followed by heavy watering) causes bitter flavor and can trigger bolting in warmer weather.
Water at the base of the plant rather than overhead. Wet foliage in cool weather is an open invitation to fungal disease, particularly in autumn crops. Drip irrigation or careful hand watering at soil level is ideal.
Mulching after establishment is highly recommended: a 2–3 inch layer of straw or woodchip retains soil moisture, regulates temperature, and suppresses weeds. In autumn, mulch helps buffer soil temperature as nights get cold, extending the harvest season.
During summer heat stress — even if you're growing kale through summer for a cut-and-come-again harvest — water in the morning so foliage dries during the day. Wilting kale in afternoon heat isn't always a watering issue; it can be a heat stress response that resolves as temperatures drop in the evening.
Organic Fertilizing Schedule for Kale
Kale is one of the heaviest nitrogen feeders in the brassica family. Underfeed it and growth stalls; leaves become pale, small, and tough. The right organic fertilizing program delivers sustained nutrition across the whole growing season without the crash-and-burn cycle of synthetic feeds.
At Planting and Early Vegetative Growth
Kale's primary demand is nitrogen for leaf expansion. Apply GOLD VEG from planting through the vegetative phase. GOLD VEG provides the balanced, plant-available nitrogen, phosphorus, and potassium that developing kale plants need, in an organic form that won't burn roots or create nutrient spikes. Apply every 2 weeks as a soil drench during active growth. This is the core of your kale feeding program — consistent GOLD VEG applications through the growing season will produce noticeably larger, darker, more productive plants.
Trace Minerals and Brix Development
High brix — the measure of dissolved sugars and minerals in plant tissue — is the marker of genuinely nutritious, flavorful kale. It's also a natural pest deterrent: insects are far less attracted to high-brix plants because the higher sugar and mineral content makes sap less digestible to them. Apply KELP IT REAL as a foliar spray every 2–3 weeks throughout the season. The full-spectrum trace minerals, natural growth hormones, and bioactive compounds in kelp measurably improve leaf color, flavor intensity, and mineral density. You'll notice the difference — organically grown kale fertilized with kelp has a depth of flavor that conventionally grown kale simply doesn't match.
Stress Recovery and Resilience
Kale regularly encounters stress — summer heat, unexpected cold snaps, transplant shock, heavy pest pressure. After any stressful event, apply VITAMIN SEA as a foliar treatment. VITAMIN SEA's combination of marine extracts and bioactive compounds activates the plant's stress response pathways, accelerating recovery and helping it return to productive growth faster. It's particularly valuable in autumn when temperature swings are unpredictable and plants need to maintain momentum for maximum harvest before winter.
Organic Pest and Disease Management
Common Pests
- Cabbage White Butterfly caterpillars: The most damaging kale pest. Caterpillars can strip a plant in days. Inspect the undersides of leaves for yellow egg clusters and remove by hand. Cover young plants with fine mesh insect netting as the most reliable prevention.
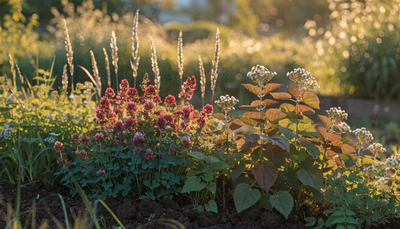
- Aphids (specifically Cabbage Aphid): Gray-green aphids that cluster on new growth and leaf undersides. Knock off with a strong water jet; apply neem oil spray for persistent infestations. Encourage ladybirds and lacewings — they're natural predators.
- Flea Beetles: Tiny jumping beetles that create small round holes in leaves, especially damaging to seedlings. Floating row cover protects young plants. Diatomaceous earth around plants deters movement in dry conditions.
- Slugs and Snails: Most problematic in wet conditions. Iron phosphate pellets are OMRI-listed and safe around pets and wildlife. Reduce habitat — remove mulch from immediately around stems.
Common Diseases
- Clubroot: A soil-borne fungal disease that causes gnarled, swollen roots and stunted growth. There is no cure — prevention is everything. Maintain proper soil pH (below 6.0 encourages it), rotate brassicas on a 4-year cycle minimum, and never plant kale in confirmed clubroot soil.
- Downy Mildew: Yellow patches on upper leaf surfaces with gray-purple fuzz underneath. Improve airflow by thinning plants. Avoid overhead watering. Apply copper-based spray at first signs.
- Black Rot: V-shaped yellow lesions starting at leaf margins. Caused by infected seed or transplants. Buy certified disease-free seed; remove and destroy affected plants promptly.
Harvesting Kale
Kale is a cut-and-come-again crop — one of its greatest advantages. Begin harvesting when plants have at least 8–10 leaves and individual leaves are 6–8 inches long. Always harvest from the outside of the plant in, removing the oldest, lowest leaves first and leaving the central growing point intact. This keeps the plant productive for months.
Never remove more than one-third of the plant at a harvest. After picking, the plant redirects energy into producing new leaves from the center. With proper care and feeding, a single kale plant can produce continuously for 8–12 months.
Leaves harvested after a frost are noticeably sweeter. This isn't imagination — cold temperatures convert stored starches in the leaf to sugars, reducing bitterness and improving flavor across all varieties. If you have a choice, plan your primary harvest for post-frost autumn and early winter.
Baby kale can be harvested from seedlings as young as 25–30 days. For baby leaves, cut across the whole plant at 2–3 inch height and allow it to regrow. This is particularly productive in spring when you want fast harvests before summer heat sets in.
Common Problems and Troubleshooting
- Pale, yellowing leaves: Nitrogen deficiency. Increase GOLD VEG applications and check soil pH. If pH is below 6.0, add garden lime to improve nitrogen availability.
- Bolting (going to flower): Caused by heat, extended day length, or drought stress. Kale is not as prone to bolting as lettuce but it will under sustained summer heat. Harvest frequently, keep roots cool with mulch, and apply VITAMIN SEA to manage stress. Once bolted, flavor deteriorates — let it flower for seed saving or pull and replant.
- Small, stunted growth despite regular watering: Check for clubroot (pull a plant and examine roots) and check soil compaction. Kale roots need oxygen as well as moisture — waterlogged or compacted soil suffocates them.
- Holes in leaves with no visible pest: Night feeders — slugs or caterpillars feeding after dark. Check plants with a torch at night to identify the culprit.
- Bitter flavor: Harvested during or after heat stress. Wait for cooler weather or a frost. Ensure consistent watering — drought stress intensifies bitterness. High-brix kale from a proper kelp foliar program is naturally less bitter.
Frequently Asked Questions
Is kale easy to grow for beginners?
Yes — kale is one of the most beginner-friendly vegetables you can grow. It tolerates frost, recovers well from pest damage, doesn't require staking or pollination, and produces over a long season. The main things to get right are nitrogen feeding and consistent moisture. If you do those two things well, kale is very hard to fail with.
When is the best time to plant kale?
Kale can be planted in spring (4–6 weeks before last frost) or late summer for an autumn/winter harvest. The autumn planting window often produces better results — plants mature into cooler weather, flavor improves after frost, and pest pressure from caterpillars is typically lower. If you only plant once a year, plant for autumn.
How do I make kale less bitter?
Three things consistently reduce bitterness: harvest after a frost (cold converts starches to sugars), harvest young leaves rather than old ones, and maintain high-brix plants through regular seaweed foliar applications. Consistent watering also helps — drought-stressed kale is always more bitter. Lacinato and Red Russian varieties are naturally milder than curly kale.
How long does kale keep producing?
With the cut-and-come-again method — harvesting outer leaves while leaving the central growing point — a single kale plant can produce continuously for 8–12 months or longer. Consistent fertilizing is key to sustained production; a well-fed plant replaces harvested leaves much faster than an underfed one.
Can I grow kale in containers?
Yes. Use containers at least 12 inches deep and 12 inches wide per plant. Fill with high-quality organic potting mix and feed regularly — container plants exhaust their nutrients faster than in-ground plants. GOLD VEG and KELP IT REAL applications every 2 weeks are essential for productive container kale. Lacinato and Red Russian varieties tend to do better in containers than large curly types.