Mint is one of the few herbs that practically grows itself — and that's exactly the problem. Left unchecked in open ground, it will colonize your entire garden bed within a single season, spreading by underground runners that are nearly impossible to fully remove. Grow it correctly, and you have a vigorous, highly productive herb with intense flavor and aroma. Ignore its spreading habit and you'll spend years pulling it out of places it was never supposed to be.
This guide covers organic mint cultivation with an honest look at container growing, variety selection, and the specific organic inputs that amplify flavor rather than just pushing leaf mass.
Choosing the Right Mint Varieties
Mint's variety list is longer than most gardeners expect. The flavor differences between varieties are significant and worth understanding before you plant.
Spearmint (Mentha spicata) is the standard — mild, sweet, clean flavor that works in everything from teas to salads to cocktails. It's the most widely grown variety and the most adaptable. If you're growing one mint, this is the reliable choice.
Peppermint (Mentha × piperita) has the highest menthol content and the strongest, most cooling flavor profile. It's a hybrid that doesn't grow true from seed — always start from cuttings or division. Better for medicinal use, strong teas, and infusions where bold mint flavor is the goal.
Mojito mint (Mentha × villosa) is the variety used in Cuban cocktails — slightly spicier, more citrusy, with a distinct aroma that differs from standard spearmint. It's worth growing separately if you're serious about fresh cocktails.
Chocolate mint (Mentha × piperita 'Chocolate') carries a genuine cocoa-mint aroma that's striking in desserts and teas. It tends toward slightly slower growth than other varieties, and the flavor fades quickly with heat — use it fresh rather than cooked.
Apple mint (Mentha suaveolens) has a softer, more rounded flavor with a mild fruity quality. It's less intense than peppermint and more aromatic than spearmint — a good middle-ground choice for culinary use.
Most mint varieties grow at similar rates and have the same cultural requirements. You can grow multiple varieties simultaneously in separate containers, which is the recommended approach if you want a mint collection.
Soil Preparation for Organic Mint
Ideal Soil Conditions
Mint prefers moist, moderately fertile soil with a pH of 6.0–7.0. It tolerates a range of soil types better than most herbs, but performs best in loamy, well-draining soil with consistent moisture. Unlike Mediterranean herbs that thrive in lean, dry conditions, mint actually wants rich, consistently moist soil — it grows naturally along streambanks and in damp meadows.
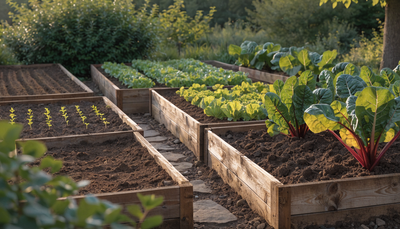
For containers (which is the correct place to grow mint), use a high-quality potting mix with strong water retention. Straight garden soil in containers compacts too quickly and inhibits the root spread that drives mint production. A blend of quality potting mix, compost, and perlite at roughly 60/30/10 gives you the right balance of nutrition, moisture retention, and drainage.
Building Living Soil
Mint grown in containers faces a specific challenge: container soil degrades faster than in-ground soil. Microbial populations decline, organic matter breaks down, and the biology that drives nutrient availability diminishes over growing seasons. This shows up as progressively weaker flavor and growth even in well-watered, fertilized plants.
Inoculating container soil with beneficial microorganisms addresses this directly. MICROBES delivers mycorrhizal fungi and beneficial bacteria that establish and maintain a living soil ecosystem in the container environment — improving nutrient uptake, supporting root health, and helping the soil biology that produces the flavor compounds mint is grown for. Apply at potting time and re-inoculate at the start of each growing season when refreshing container soil.
Top-dress containers with compost every 4–6 weeks through the active growing season to feed soil biology and maintain organic matter levels.
Planting Mint: Timing and Technique
Mint is almost never worth starting from seed. Germination is slow and unreliable, and most flavorful varieties (peppermint, mojito mint, chocolate mint) don't grow true from seed anyway. Start from transplants, cuttings, or divisions — all three establish quickly and give you a productive plant within weeks.
Mint transplants well in spring once frost risk has passed, and again in early fall for indoor growing. It's cold-hardy in most zones (USDA 3–9 depending on variety) and can be overwintered outdoors in containers in mild climates if moved to a protected location.
Container selection is critical. Choose containers that are wide rather than deep — mint spreads horizontally by runners, not deeply by taproot. A 12–16 inch wide container holds one variety comfortably; larger containers can accommodate two plants of the same variety. Ensure drainage holes are adequate — mint wants moisture but roots will rot in standing water.
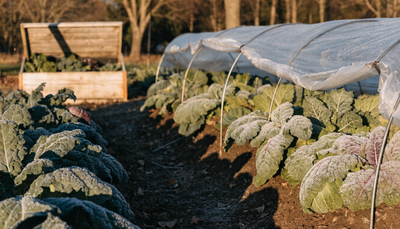
If you want to grow mint in the ground, the standard approach is containment planting: sink a container (plastic pot with the bottom cut out, or a purpose-made root barrier) at least 12 inches deep into the soil before planting. This restricts runner spread while giving roots access to ground moisture. It works reasonably well, but requires monitoring — runners will eventually find their way over the top of the barrier if not trimmed back.
Watering Mint Organically
Mint needs consistently moist soil — not wet, but never dried out. Container-grown mint is particularly vulnerable to moisture stress because containers dry out much faster than ground soil, especially in warm weather or when roots have filled the pot.
Check containers daily in summer; watering twice daily may be necessary during heat spikes for established, root-bound plants. A simple moisture test: push your finger 1–2 inches into the soil. If it feels dry at that depth, water thoroughly until water drains from the bottom.
Wilted mint recovers quickly from minor water stress, but repeated wilting damages the aromatic oil glands that produce flavor. Consistent moisture is one of the primary factors separating intensely flavored mint from mediocre-flavored mint. Overhead watering is fine for mint — unlike many herbs, it doesn't suffer from wet foliage in normal conditions.
Organic Fertilizing Schedule for Mint
Mint responds well to moderate, consistent feeding. Over-fertilizing with high-nitrogen inputs produces rapid, lush growth with diluted flavor — the essential oil concentration decreases as leaf tissue expands faster than oil production can keep up. The goal is steady, healthy growth that allows oil concentration to develop fully.
For leaf and stem production: Apply GOLD VEG every 10–14 days through the active growing season. The balanced nitrogen profile supports productive leaf development without pushing the rapid, diluted growth that high-nitrogen products cause in herbs. Established container plants benefit most — young transplants in fresh potting mix can start feeding after the first 2–3 weeks once roots are established.
For essential oil intensity and flavor concentration: Incorporate KELP IT REAL into your feeding rotation, alternating with GOLD VEG or applying together at half strength each. Kelp's natural auxins, cytokinins, and trace mineral profile actively stimulate the biological processes that produce essential oils in aromatic herbs. The difference in flavor intensity between kelp-fed mint and unfed or nitrogen-only mint is noticeable — leaves are more aromatic, flavor lasts longer after harvest, and dried mint retains more of its character.
For stress recovery: After aggressive harvesting, heat stress, or transplanting, apply VITAMIN SEA as a foliar spray or soil drench. The bioavailable nutrients and natural growth factors support rapid recovery and help plants bounce back to full production within days rather than weeks. This is particularly useful in late summer when heat stress and heavy harvesting cycles combine to slow regrowth.
Reduce or suspend feeding in late fall if overwintering containers outdoors — feeding during dormancy or slow-growth periods encourages soft, frost-vulnerable growth.
Organic Pest and Disease Management
Mint's strong aromatic oils actually repel many common garden pests, which is one reason it's often used as a companion plant. That said, it's not pest-free.
Aphids: Tend to cluster on new growth, especially in spring. A strong stream of water dislodges them effectively. Insecticidal soap spray handles persistent infestations. Lady beetles and parasitic wasps naturally control aphid populations in outdoor gardens — avoid broad-spectrum sprays that eliminate these beneficials.
Spider mites: More common in hot, dry conditions and particularly problematic for indoor mint. They create fine webbing on leaf undersides and cause stippled, pale leaf surfaces. Increase humidity around plants, spray foliage with water regularly, and apply neem oil spray weekly at first sign of infestation.
Mint rust: A fungal disease that shows as orange-brown pustules on leaf undersides, with corresponding yellow spots on the upper surface. Remove infected leaves immediately. Improve air circulation. Avoid overhead watering if rust is present. Severely infected plants should be discarded — rust persists in plant tissue and soil.
Verticillium wilt: A soil-borne fungal disease that causes progressive wilting and dieback. Once present in soil, it persists for years. Container growing with fresh, quality potting mix is your best protection — this is another reason containers are preferable to open ground for mint.
Harvesting Mint
Mint can be harvested as soon as plants are 6–8 inches tall. Regular harvesting is not just acceptable — it's actively beneficial. Cutting back mint prevents it from going to flower, which would reduce leaf production and essential oil concentration in the remaining foliage.
Harvest by cutting stems back to just above a leaf node, leaving at least one-third of the plant intact. Never strip all the leaves from a plant at once — it will recover, but slowly. For maximum flavor, harvest in the morning after any dew has dried but before the heat of the day — essential oil concentration is highest at this point.
When plants begin producing flower buds, pinch them off immediately. Allowing mint to flower shifts the plant's energy from leaf production to seed production and significantly reduces both yield and flavor. If you miss the flowers and plants go to seed, cut plants back hard to 2–3 inches from the soil — they'll regrow vigorously within 2–3 weeks.
Fresh mint is best used immediately. For storage, wrap stems in a damp paper towel and refrigerate for up to a week, or place stems in a glass of water like cut flowers. For drying, hang small bundles in a warm, dark, well-ventilated location — dried mint retains acceptable flavor but will always be less intense than fresh.
Common Problems and Troubleshooting
Mint losing flavor or becoming bland: The most common cause is going to flower — pinch flower buds immediately and cut plants back hard to trigger fresh leaf production. Second cause is high-nitrogen feeding that drives rapid growth without oil development — switch to a balanced fertilizer and add kelp to the feeding rotation.
Yellowing lower leaves: Usually a nitrogen deficiency or natural senescence of older leaves. Remove yellow leaves, ensure consistent feeding with GOLD VEG, and check that containers have adequate drainage (yellowing with soggy soil indicates root rot, not deficiency).
Leggy, thin stems reaching toward light: Insufficient light. Mint needs 4–6 hours of direct sunlight minimum for compact, productive growth. Move containers to a brighter location. Pinching back leggy growth encourages bushier habit.
Roots coming out of drainage holes / wilting quickly after watering: Plant is root-bound. Repot into a container 2–4 inches larger in diameter, or divide the plant and move into two containers. Root-bound mint goes into rapid decline — address it promptly.
Mint spreading where it wasn't planted: Underground runners escaped containment. Trace and cut back runners to the main root system. For persistent problems, remove plant and install a proper root barrier before replanting, or switch entirely to container growing.
Frequently Asked Questions
- Does mint come back every year?
- Yes — mint is a perennial in most climates (USDA zones 3–9). Container-grown mint can be overwintered by moving pots to a protected location or unheated garage where they won't freeze solid. Cut plants back in fall and they'll regrow from the root system in spring. In-ground mint in cold climates often dies back to the roots and resurfaces each spring.
- Can I grow different mint varieties together in the same container?
- Technically yes, but not recommended. Mint varieties spread aggressively and one will typically outcompete the others within a season, leaving you with a single dominant variety. Grow each variety in its own container for clean, consistent flavor and to prevent cross-suppression.
- How do I grow mint indoors?
- Mint grows well indoors with adequate light — a south-facing window or supplemental grow light providing 6+ hours of bright light is sufficient. Keep soil consistently moist, maintain good air circulation to prevent mildew, and feed regularly with a balanced liquid fertilizer. Indoor mint may grow more slowly than outdoor plants but produces intensely flavored leaves year-round.
- Why does my mint taste like nothing?
- Three main causes: the plant has gone to flower (pinch buds and cut back hard); it's been over-fed with high-nitrogen fertilizer (switch to balanced feeding and add kelp); or it's a seed-grown variety of uncertain genetics. Named cultivars started from cuttings reliably produce strong flavor — discount seed-grown mint is often weak-flavored regardless of care.
- Can mint grow in full shade?
- Mint tolerates partial shade better than most herbs and actually benefits from afternoon shade in hot climates, which prevents wilting and keeps foliage from drying out. But full shade produces weak, leggy, low-flavor plants. Aim for at least 4 hours of direct sun — morning sun with afternoon shade is the ideal exposure in warm climates.